Location: Seattle, WA
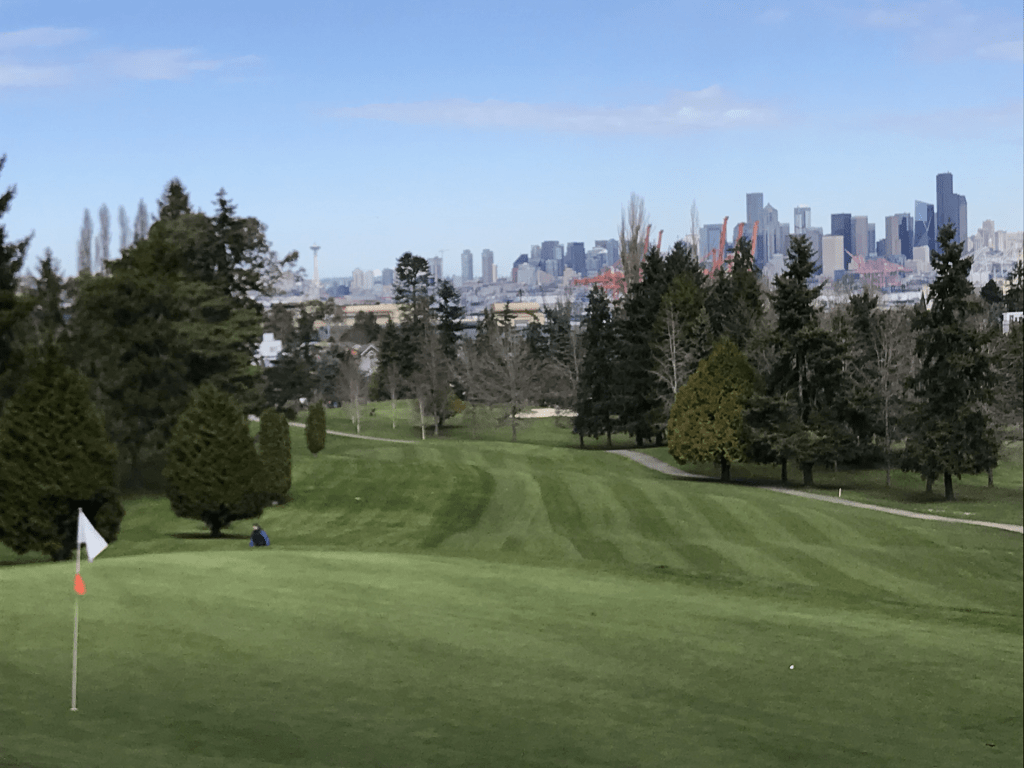
West Seattle Golf Course is arguably one of the finest municipal golf courses in the Pacific Northwest, set in the heart of West Seattle with beautiful views of Mount Rainier, the downtown Seattle skyline and Space Needle, Elliot Bay, and on a clear day, Mount Baker. The course has been around for decades, having opened in 1940, and was designed by H. Chandler Egan, who is famous for leading the redesign and modernization of Pebble Beach. West Seattle hosts the Seattle Amateur, and in addition to beautiful views, a round of golf here offers challenges from significant elevation changes and at times strong winds off of the Puget Sound.
The front 9 of West Seattle boasts three par 5s and plays to a par of 37, and while the back 9 only plays to a par of 35, it is significantly hillier than the front. Read below for a hole-by-hole breakdown (note, yardages reflect the blue tees – Men 69.4/123, Women 75.4/128)
Hole 1 – handicap 5:
West Seattle opens with a 544 yard par 5 that features stunning views of Mount Rainier. Though the hole is straight and does not have much elevation change, there is fairway bunker on the right side that is in play for drives of over 250 yards. The green is protected by a bunker on the left, and is one of the most challenging greens on the course, funneling everything toward the bunker. Additionally, take caution with your approach shot, as there is a large drop off behind the green. A long approach shot will result in a 30 yard, blind, uphill chip back to the already challenging green.
Hole 2 – handicap 11:
The second hole is a short 320 yard par 4 that has a sharp dogleg right and dense trees and a ravine the entire length of the right side of the hole. The green is protected by a large bunker on the left, and like the first hole, will also punish approach shots that miss long or to the right, as those will find the ravine. The best strategy on this hole is to tee off with a low or middle iron, getting past the dogleg and leaving 130-140 yards to the green. Then, plan to miss short with the approach shot and allow the downhill slope to roll the ball onto the green, taking the ravine out of play.
Hole 3 – handicap 17:
Hole 3, a short 121 par 3, presents the challenge of landing the tee shot on an elevated green, protected on the left by a large greenside bunker. Ensure you give yourself enough club to get there, as short shots risk rolling all the way down to the bottom of the hill. The green itself is large, and there is plenty of room at the back to miss long.
Hole 4 – handicap 1:
The fourth hole, a 524 yard par 5, is the toughest hole on the course according to handicap, and boasts the most challenging tee shot on the course and a narrow fairway, especially on the left. Golfers will tee off uphill, and must carry drives at least 230 yards to get to the top of the hill to have a flat lie and avoid a blind second shot. There are dense trees on the left, and not much room before the ball is out of bounds. There is room to miss right, but then the second shot must carry trees 130-150 yards in the distance, depending on your angle. Golfers who make it to the top of the hill and land in the fairway will have a birdie opportunity, though, as the green is large and flat, and protected by only one greenside bunker on the left, though golfers could find two large trees on the right hand side of the fairway near the green tricky.
Hole 5 – handicap 9:
After the monster 4th hole, golfers get to head back downhill on the 432 yard, par 4 5th hole. Drives of at least 240 yards will catch a down-slope, giving even more distance and making the approach shot to the green easier without the challenge of hitting from a downhill lie. There should not be any lost balls on this hole, as even the most errant shots will find either the 4th fairway or the approach to the par 3 6th. There is a large, shallow bunker on the back left of the green, but it is seldom in play as pin placement tends to be in the front or center of the green. The only trouble on this hole would come from an approach shot that misses long, as there are woods behind the green.
Hole 6 – handicap 13:
The 6th hole presents golfers a straight, 170 yard par 3, with a slightly elevated green protected by bunkers on both sides. There are dense woods on the right, and though you will find a tee shot to the left, the chip may be obstructed by trees. The green is large (especially laterally), and there is plenty of room to miss short, as the area in front of the green is cut like a fairway. There is not too much room behind the green before a shot would run into the trees protecting the 7th tee box. It is better to miss short than miss long on this hole.
Hole 7 – handicap 15:
The short, 322 yard par 4 7th presents golfers with another birdie opportunity, as this straight hole offers a tee shot over the Longfellow Creek ravine onto a wide fairway. The ravine stretches the entire left side of the hole, making that the side to avoid, because even tee shots that miss right will end up in the 8th fairway and still have a straightforward shot to the green over a stand of trees. There is a single fairway bunker on the right side two-thirds of the way to the green, and a single greenside bunker on the front left. The green is challenging, with a pronounced left to right down-slope and a hill on back left. Given the nature of the green, golfers should aim to stick their approach shot in the center, rather than running it up to the hole.
Hole 8 – handicap 7:
The 401 yard par 4 8th has a sharp dogleg left, forcing golfers to choose their tee shot strategy wisely. It is possible to cut the corner, leaving a 130-140 yard second shot to the hole, but that is not without risk, as the entire left side of the hold is flanked by dense woods. If choosing not to cut the corner, a tee shot with a hybrid or low iron will still leave 200 yards to the hole. Complicating things further, hitting driver straight risks overshooting the fairway, especially during the dry summer months, which would take the ball into the ravine golfers tee off over on the 7th. The green is challenging too, with one of the deepest greenside bunkers the course offers on the front right and the face of a hill in the back, giving any approach shots that miss long a difficult lie for the chip back onto the green. Still, golfers who successfully cut the corner will set themselves up nicely for a birdie. All in all, though, this is a challenging hole that could have a higher handicap.
Hole 9 – handicap 3:
Hole 9, a 551 yard par 5, is the longest hole on the course and presents multiple challenges near the green. Though the tee shot is straightforward, with room to miss on both the right and left sides of the fairway, second shots that miss to the right will roll downhill to a thick grove of trees, making it impossible to land a third shot on the green. The best strategy on this hole is to stay on the left side of the fairway with the second shot, taking the late dogleg right out of play and leaving around a 100-110 yard shot to the green. Longer second shots will catch a down-slope, making this green play like an intimidating elevated green, with the deepest bunker on the course protecting the entire front face. There isn’t much room behind the green either, as shots that miss long will land on the face of a hill up toward the parking lot. It is possible to score on this hole, but it requires strategy and precision, especially on the second shot.
Hole 10: – handicap 8
The 10th hole is a 363 yard par 4 that winds downhill to the left and offers the best views of Mount Rainier on the course. This hole is deceptive due to the elevation change, and there’s a temptation to lay up with a middle iron before the downhill. However, that leaves a 150-170 blind shot to the green, so golfers should play this hole aggressively and hit driver to catch the down-slope. The woods to the left of the fairway should not threaten a tee shot, and even if the tee shot finds the trees to the right, there is still a chance to have a second shot that can reach the green. This hole features a round green with a sharp slope from the back down to the front. Though there is no sand, there is a steep drop off the back of the green, so golfers should plan their approach shot to stay below the pin, preserving the uphill put. This hole also offers a bump and run opportunity, rather than a traditional pitch, if the tee shot lands in the fairway.
Hole 11 – handicap 18:
The 11th hole is handicapped as the easiest hole on the course, and presents a 156 yard, downhill par 3 with a tee shot from a elevated box ideally finding a circular green surrounded by trees. About the only way to get in trouble on this hole, which has no sand, is to hit a tee shot long and left, which will find a ravine. This hole does have a tendency to play shorter than its distance, so consider clubbing down if there is wind at your back. There’s plenty of room to be short, and a wide fringe and fairway cut grass in front of the green even offers a straightforward putt from off the green.
Hole 12 – handicap 2:
Hole 12, a 489 par 5, is rated as the second-toughest hole on the course and offers a beautiful view of the Seattle skyline from the elevated tee box. This hole has significant elevation changes, but if played with the proper strategy, offers an opportunity for birdie – or even eagle. The tee shot will fly through a narrow corridor of trees over a ravine, but as it carries, the fairway widens. There are woods in play along the right hand side and a fairway bunker 250 yards on the left, but most tee shots should find the fairway, which is the widest fairway on the course in the landing zone. Then, a decision awaits those golfers who can drive it 270 yards or more. Beyond the tee shot landing zone is a steep down-slope, followed by the largest uphill on the course up to the elevated green. The green is large, but is protected by a bunker on the left side. Therefore, an accurate fairway wood or low iron (I used a 2 iron last round to get there and have an eagle putt) offers a chance to land the second shot on the green. However, if you do not go for the green, hit your second shot with a high iron, like a 7 or an 8, with the goal of carrying the down-slope but landing on flat ground before the steep uphill. This will offer the best lie for the third shot, which in this case would be around 100 yards straight uphill.

Hole 13: – handicap 16
The 13th hole is a 168 yard par 3, which always seems to play a bit longer (I typically hit a 180 yard club). I always found this hole speaks to how well the course is designed, because this is the only hole on the course where the sun has even a possibility of being in your eyes, and only if playing in the late afternoon. Your tee shot needs at least 135 yards to carry a ravine, and will ideally find the widest green on the course, even though it is not very deep. The green is protected by large bunkers on the front right and back left, but given typical pin placement, only the back left bunker is normally in play.
Hole 14 – handicap 4:
Hole 14 is a challenging, 378 yard par 4 that bends uphill to the right to an elevated green. There are trees in play on each side of the fairway (though little danger of losing a ball) and a fairway bunker on the left. The most difficult aspect of this hole is the green itself, which sits up almost on a shelf with a deep bunker protecting its left side. There is a steep drop off to the front and left sides of the green, and approach shots that fall short risk rolling back down the slope. Additionally, the green pushes all putts down the hill and toward the sand trap, so it is easiest to stay below the hole. From the tee box this hole doesn’t seem that bad, but it always plays tough. The redeeming aspect of this green is it offers a full view of the Seattle skyline, including the Space Needle, and on a clear day, Mount Baker too.
Hole 15 – handicap 6:
I’ve heard anecdotally that H. Chandler Egan, the course designer, passed away before finishing the last four holes, and though I’m not sure if that’s true, the last four holes do lack the creativity of the previous fourteen, though they do offer skyline and Sound views from either the tee box or the green. The 15th hole is in many ways a reverse of the 14th hole, with a elevated tee box revealing a hole that bends downhill and to the left. Though there are some trees on both sides of the fairway, golfers who hit their tee shot at least 230 yards guarantee themselves a flat lie for their second shot onto a large green protected by a sand trap on much of the front side. The challenge of this hole comes from the placement of the sand trap, but there is a path up the left side of the fairway and green that takes the sand out of play. This hole is rated as the sixth-toughest, but in my mind it belongs behind both 7 and 10.
Hole 16 – handicap 10:
The 16th hole, a 368 yard par 4, takes golfers back up the hill, and is similar to the 14th hole, though without the dogleg. There are trees on both sides of the fairway, but no fairway bunkers and golfers should be aggressive with their drives. The green is elevated, like 14, and is also protected by a bunker on the left side, but does not offer the same challenge as the 14th green. If this hole did not have the elevation change to contend with, it would be one of the easier ones on the course. It does offer the best view of the Seattle skyline and Elliott Bay on the entire course from the green, though.
Hole 17 – handicap 14:
The 17th hole, a 360 yard par 4, is the reverse of the 16th hole, with an elevated tee box with a great view of the Seattle skyline taking golfers down a straight downhill to the green. There are no fairway bunkers and only some assorted trees lining the fairway, so golfers should be aggressive. The green is protected by bunkers on both sides, but drives that land in the fairway will offer good lies, setting up accurate second shots onto the green.
Hole 18: – handicap 12
The 18th hole, a 341 yard par 4, offers golfers another chance to score, with a flat and straight fairway, though a bit narrow in places. This is the only hole of the last four that will punish a bad tee shot though, as a slope on the left side of the fairway will carry misses to the bottom of a hill, and tee shots to the right risk ending up out of bounds or on the putting green. The green is protected by a bunker on the front left, but otherwise is not too challenging. This is a fun hole to end on, and match play events always seem to have a way of coming down to this hole.
Overall Course Rating:
- Course Condition – 8/10 – wonderful early in the year, gets a bit dry as is typical for a Seattle course. Overall off the charts for a municipal course
- Course Beauty – 10/10 – Seattle skyline, Mount Rainier, Elliott Bay, and Mount Baker
- Pace of Play – 7/10 – weekend rounds in the summer are over 5 hours as this course attracts golfers of all levels, but non-peak time rounds can be played in 3-3.5 hours
- Amenities – 7/10 – there is a clubhouse, pro shop, event space, bar, and kitchen – nothing fancy but everything you need is there
- Value – 8/10 – can be expensive for a municipal course at peak times, but this doesn’t feel like a municipal course and they offer dynamic pricing to better meet demand
- Overall – highly recommend

One Comment Add yours